投稿日:
業務で「ヘッドレスCMS・Kuroco」を扱うかもしれないので色々調査中。
KurocoFrontはCloudflare PagesやVercelと違ってビルド機能は無い。Amazon S3のようにあくまでHTML/CSS/JSをホスティングするサーバー。
ビルドや転送はGithub Actionsを利用する。
参考: GitHubからKurocoFrontへソースをデプロイする方法 | 導入実績6000社以上の国産エンタープライズ・ヘッドレスCMS
1. KurocoFrontとGithubを接続する
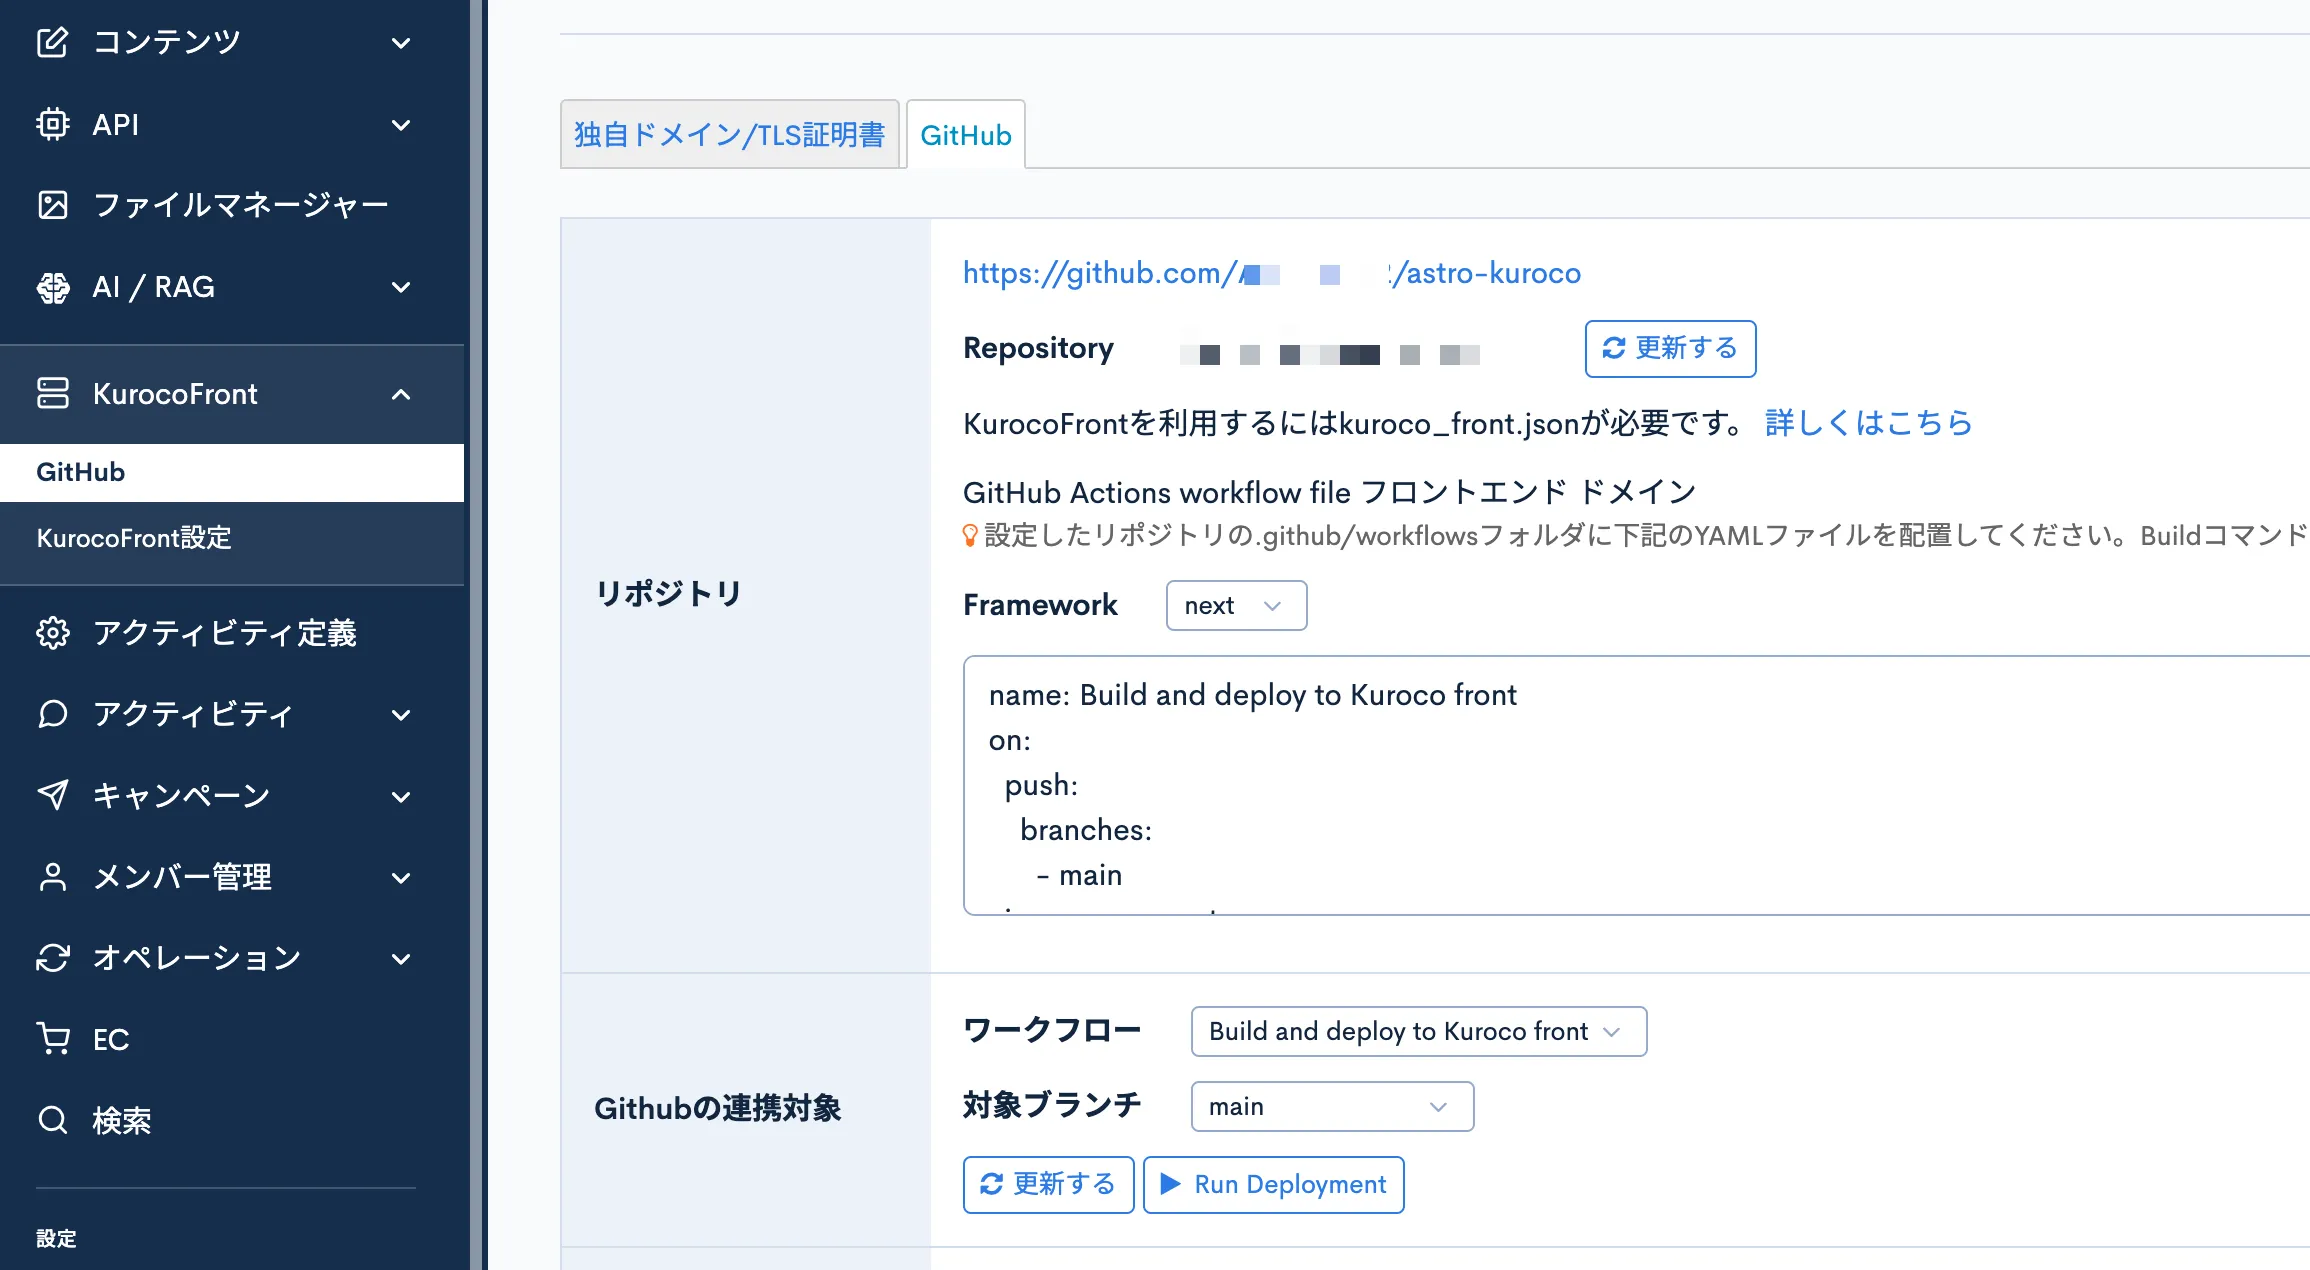
これは簡単。以下の画面から手順に従うだけでコネクトが可能。
2. 必要なファイルの作成
public/kuroco_front.json に以下を書く。
{
  "rewrites": [
    {
      "source": ".*",
      "destination": "/index.html"
    }
  ],
  "redirects": [],
  "basic": [],
  "ip_restrictions": []
}
kuroco_front.json ではURLのリライト処理やBasic認証、IPアドレス制限の設定が可能らしい。ステージングサイトには適用したらいいかも。
3. GitHub Actionsのワークフローを追加
↑の画面キャプチャにNext.jsのワークフロー例が乗っているので、アプトプット先のディレクトリをAstro用に変更しただけ。
このワークフローファイルは2つのジョブで構成されている。
3.1 プルリクエスト用のビルド(pullreq_build)
プルリクエストに /kuroco stage コメントが付いた時に実行される。ステージング環境へのデプロイ用です。
主な処理の流れ:
- プルリクエストのブランチ名とSHAを取得
- 指定されたブランチをチェックアウト
- Node.js 22.xの環境をセットアップ
- 依存関係のインストール(キャッシュを活用)
- Astroアプリのビルド
- ビルド成果物をZIP化
- 成果物をGitHub Artifactsとして保存
- KurocoFrontのWebhookを呼び出してデプロイ
3.2 メインブランチへのプッシュ用ビルド(pushed_build)
mainブランチへのプッシュ時や手動実行時に実行されます。本番環境へのデプロイ用です。
主な処理の流れ:
- リポジトリのチェックアウト
- Node.js 22.xの環境をセットアップ
- 依存関係のインストール(キャッシュを活用)
- Astroアプリのビルド
- ビルド成果物をZIP化
- 成果物をGitHub Artifactsとして保存
- KurocoFrontのWebhookを呼び出してデプロイ
3.3 共通の設定
concurrency: 同じワークフローが同時に実行されないように制御retention-days: 7: ビルド成果物は7日間保持webhook_secret: KurocoFrontとの連携用のトークン
name: Build and deploy to Kuroco front
on:
  push:
    branches:
      - main
  issue_comment:
    types: [created, edited]
  workflow_dispatch:

concurrency:
  group: ${{ github.workflow }}-${{ github.ref }}
  cancel-in-progress: true

jobs:
  #for Push
  pushed_build:
    name: Build(pushed)
    if: (github.repository == 'ANTON072/astro-kuroco' && (github.event_name == 'push' || github.event_name == 'workflow_dispatch'))
    runs-on: ubuntu-latest
    steps:
      - name: Checkout Repo
        uses: actions/checkout@v4
      - name: Use Node.js
        uses: actions/setup-node@v4
        with:
          node-version: '22.x'

      - name: CI Cache
        uses: actions/cache@v4
        id: node_modules_cache_id
        env:
          cache-name: cache-node-modules
        with:
          path: '**/node_modules'
          key: ${{ runner.os }}-build-${{ env.cache-name }}-${{ env.BRANCH }}-${{ hashFiles('**/package-lock.json') }}
      - name: Install dependencies
        if: ${{ steps.node_modules_cache_id.outputs.cache-hit != 'true' }}
        run: npm ci
      - name: Build
        run: npm run build
      - name: Zip artifact for upload
        run: cd dist && zip ../dist.zip . -r
      - name: Archive Production Artifact
        uses: actions/upload-artifact@v4
        with:
          name: ${{ github.sha }}-${{ github.run_id }}
          path: dist.zip
          retention-days: 7
      - name: Webhook
        uses: diverta/workflow-webhook@v3
        env:
          webhook_url: 'https://to-r.g.kuroco.app/direct/menu/github/'
          webhook_secret: 'xxx'
          data: '{"single_zip":"1","domain":"to-r.g.kuroco-front.app","pr":"${{ github.event.issue.pull_request.url }}",  "repository":"${{ github.repository }}", "run_id":"${{ github.run_id }}", "hash":"${{ github.sha }}"}'
ステージング環境としてKurocoでサイト一覧からサイトをもう一つ追加。そのKurocoFrontにステージングとしてデプロイしようと思ったが、どうやらそれはできないっぽい。
Githubリポジトリには1つのサイトしか紐付けられないから?